The Zoo Med ReptiTemp Digital Thermostat is a temperature control system that can be used with a variety of Zoo Med heaters and cooling products for terrariums.
The thermostat is easy to use and comes with large and easy to read LCD display, enabling you to choose between Celsius and Fahrenheit, for convenience. A reliable way to manage your substrate heating temperatures with ease.
Pros
- Temperature ranges between 50ºF and 122ºF
- Control temperature by switching between Heat and Cool Modes
- Remote temperature probe with 6 feet of cable
- Can control up to 600W of heating devices
- Can control up to 150W of cooling devices
- Easily change between Fahrenheit and Celsius
Cons
- The bright display can be frustrating at night, especially for nocturnal pets
Design and Features
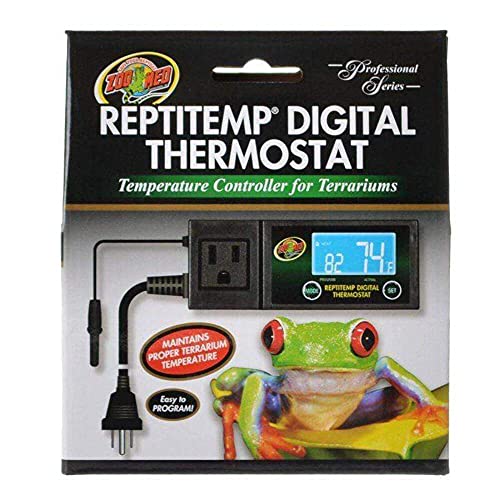
The Zoo Med ReptiTemp Digital Thermostat is a simple black control box that measures 3” x 7” x 7.5”.
The box weighs 15.3 ounces and has a bright and easy to read LCD display with two buttons: Mode and Set.
The plug for your under tank heater is located next to the LCD display with the remote probe and mains power cord being located on the side, enabling you to mount your thermostat anywhere on or around your terrarium with ease.
Some of the Best Features Include
- Controls up to 600W of heating devices and 150W cooling devices
- Works with any under tank heater, ceramic heat emitter and cooling fan system
- The remote sensor comes with 6 feet / 185cm of cable
- Easy to change between heat and cool
- LCD display
- Convenient two-button programming
- Controls temperatures between 50ºF and 122ºF (10ºC to 50ºC)
- Built-in memory in the event of power failure
- Alarm flashes and sounds when temperatures reach extreme high or low levels
Accessories and Parts
Zoo Med Digital Thermometer

It’s important to monitor your terrarium internal temperatures.
You cannot rely on your thermostat to maintain the temperatures; regular monitoring ensures you maintain required temperatures to make your reptile comfortable and healthy.
The Zoo Med Digital Thermometer has a waterproof external sensor that enables you to read both Fahrenheit or Celsius temperatures on the easy to read LCD display.
The probe can be easily mounted on the enclosure using the suction cups provided.
The digital display is mounted outside the terrarium in a dry location.
The LR44, 1.5V battery is included.
Installation and Usage
You may feel a bit overwhelmed when turning on your Zoo Med ReptiTemp Digital Thermostat for the first time.
The digital display lights up with all the symbols, but this is only for a short period and then it automatically returns to default factory settings.
Once you have selected your own settings, they will be stored in the control unit, which means you don’t have to reprogram the thermostat when the power is turned off.
Programming the Temperature
The thermostat will turn your heating or cooling device on and off as needed to maintain a constant temperature chosen by you.
You can set the temperature in Celsius or Fahrenheit, depending on your own preference.
- Press and then release the Mode button to choose between Celsius or Fahrenheit.
- Using the Set button, you can choose your temperature setting. Press Set and the word Program will start flashing. You can use the Set button to change the programmed temperatures by one degree while they are flashing. Hold the button to increase by several degrees. Once you select your desired temperature the controller will automatically exit programming and return to display mode with your desired temperature within five seconds. Your chosen temperature will be displayed above the world Program.
- The temperature is set and can be changed with ease by simply pressing the Set button.
How to Choose Heat and Cool Modes
When the thermostat is in heat mode, it will turn on heating devices when the terrarium temperature drops below the required setting.
When you are in cool mode, the device will turn on any cooling devices when the temperature inside the terrarium rises above the chosen setting.
The Zoo Med ReptiTemp Digital Thermostat can be changed between Heat and Cool with ease.
Simply press and hold the Mode button until either Heat or Cool is displayed.
The world will flash until you press the Set button to switch between the two.
When you have made your selection, simply wait five seconds and the device will automatically store your setting and exit programming.
How to Program the Alarm
Programming the alarm is quick and easy and is the additional peace of mind for you that should your terrarium not be hot enough or be too hot, the alarm will advise you so you can make necessary adjustments immediately.
The alarm feature is automatically turned off in default settings, so you will need to set it to alert you when your terrarium is not at desired temperatures.
Should the alarm trigger, the controller will start beeping and “Alarm” will flash on the LCD display.
To silence the alarm, you press the Set button.
To program the alarm, you will want to go into the programming function, which means pressing and holding Mode until Heat or Cool starts to flash on the display.
You will want to hold and press again until you see the world “Alarm” flashing on the display with the word “Actual.”
You will want to press the Set button while the words are still flashing.
Pressing Set will program the temperature change to trigger the alarm. This is the temperature setting that will activate the alarm.
If you choose a setting of 10ºF and your thermostat is set to 85ºF, your alarm will sound should the temperature drop to 75ºF or rise to 95ºF.
If the alarm is disabled it will be set to 00.
After you program the alarm, simply wait five seconds and the controller will automatically save your settings and exit programming. d resumes normal function.
Installing your Zoo Med ReptiTemp Digital Thermostat
Once you have finished the programming and your desired temperatures are saved, you can get ready to install the thermostat to your terrarium. Simply follow these five easy steps:
- Your terrarium should be completely set up with your heating or cooling device in place.
- Install your temperature sensor by placing the remote probe in the chosen location. The sensor can be attached to the inside of the terrarium walls using the suction cup provided.
- The control unit should be mounted outside the terrarium. Do not place inside the terrarium and high temperature and humidity can result in failure. You can use the two-strip hook and loop fastener to attach it to the side of the terrarium or you can rest it on a flat surface next to the enclosure, remember you have 6 feet of cord on your remote probe.
- Plug your thermostat into the power. It should already be programmed as above. You don’t need to reprogram; it will revert to the previous settings.
- Plug your heating or cooling device into the front socket on the controller and make sure the device is turned on.
Important Usage Notes
- Never use the thermostat to control mercury vapor UVB bulbs or rock heaters
- Be mindful when it comes to sensor placement. You don’t want your sensor too close to your heating or cooling device, ensure you place it where you can get an accurate gradient temperature.
- You can restore your thermostat to default settings at any time by pressing and holding the Mode and Set buttons at the same time for three seconds. This will erase any programming
Is This a Good Value Product?
The Zoo Med ReptiTemp Digital Thermostat is ideal to manage your heating and cooling devices with ease. Failing to follow the safety precautions and instructions, the unit may stop working.
Suitable for all reptiles and amphibians, whether they require a substrate heater or a cooling fan.
Zoo Med ReptiTemp Digital Thermostat Review in Summary
Overall, the Zoo Med ReptiTemp Digital Thermostat is an excellent thermostat for any reptile or amphibian. The thermostat can be used with any type of under tank heater, ceramic heat emitter, or cooling fan system.